Friday, 18 March 2011

Wednesday 9th March

Wednesday 9th March


After looking back at the footage I felt let down there wasn’t much we could use, in the process of filming we thought we were doing well but when we got feedback from our teacher it wasn’t our best and that it may need doing again. This put the group’s confidence down and their doubts that the film won’t be done and won’t look good where becoming more and more worrying. This lead to the group changing the idea and the plot of the story which upset me as I am not accustomed to change and I too was disappointed with the feedback but I wanted to resolve this issue and look at how we can make it better and carry on with the idea and keep filming. But the group wanted to do it differently due to the lack of confidence and doubts. I had a plan of action going what I wanted to film and what needed filming and it wasn’t going to plan, ideas and schedules where changing from the rest of the group which put me into doubt and made me worry more. I looked at the footage on and saw that they was little footage to be used but there is still footage that can be used for the film and that was only Michaellas shots.

Tuesday 8th March - Filming Session 1

The Performance of the Girls for the Film

Today we filmed the performance of the girls. It was decided that me and Michaela was to be in the film as the performers. I didn’t mind being in front of the camera. But I found it hard to film and be in the film at the same time. It took me 25-30 minutes to get the stage prepared as well has getting myself ready. It took me at least 30 minutes to get the music to work which wasted valuable filming time. While I was waiting for the music to work, from the help of Kerry and George I started to work on Michaela's shots on the piano I used the following shots

Mid Shot - From the other end of the piano, camera sitting on the piano

Close up Shot - Of Michaela's fingers playing the piano.

Low angle Shot/Tilt - Of Michaela playing the piano

Bird’s Eye View/Tracking shot/Close up - Along the piano Keys of Michaela playing the piano

Close up Shot - Of Michaela playing the piano, front view, so you can see her face and half her body and her playing the piano.

With these variety of shots I can make a more interesting piece of footage, which makes the film less boring with the same styles of shots used in every piece.

When the Music was up and running we had a friend of Michaela's who helped us with the filming of us both as well has a friend of mine called Jennifer.
After Lunch Alex and Shasta came in and we did some more filming, this time Alex was able to film some shots for us so that it made it easier for us to capture.
Within today’s session we took some photos of us and Michaela so we can print them out and use them for the stalkers scene.
I felt today went well, I felt a bit disappointed that the sound and music system to a while to get up and running and we had to keep going back and forth to play the music again. I feel the overall progress was good and we captured good amounts of footage. Next time we shoot for the performance I will make sure that the Stage is ready and the sound and lighting system is up and running before going ahead with the filming session.


 The piano is in place on a slant so we see part of Micaela as well has a good shot of the body of the piano.
 Michaela's Friend helping with the Sound and Music System
The stage is prepared and the camera is in place on the tripod.
 Getting good angle shots of the performance and as well has good shots for the pictures.
 Michaela helping to film the performance piece with just me in the shots.
 Pictures for the stalker and good angle shots for the performance piece.
 Kerry helping with the sound system. She is contacting George to help with the sound.
 The sound and lighting system (lighting system on the left)
 Jennifer helping with the filming getting the right angles, panning and shots for the piece.
 Another shot of the stage and piano. The stage and Piano are placed close together so that we can have some interaction with me and the Michaela by having me sitting on the piano and singing to Michaela to make it more entertaining.
The lighting and sound box at the top.

Tuesday, 15 March 2011

Logo

Logo

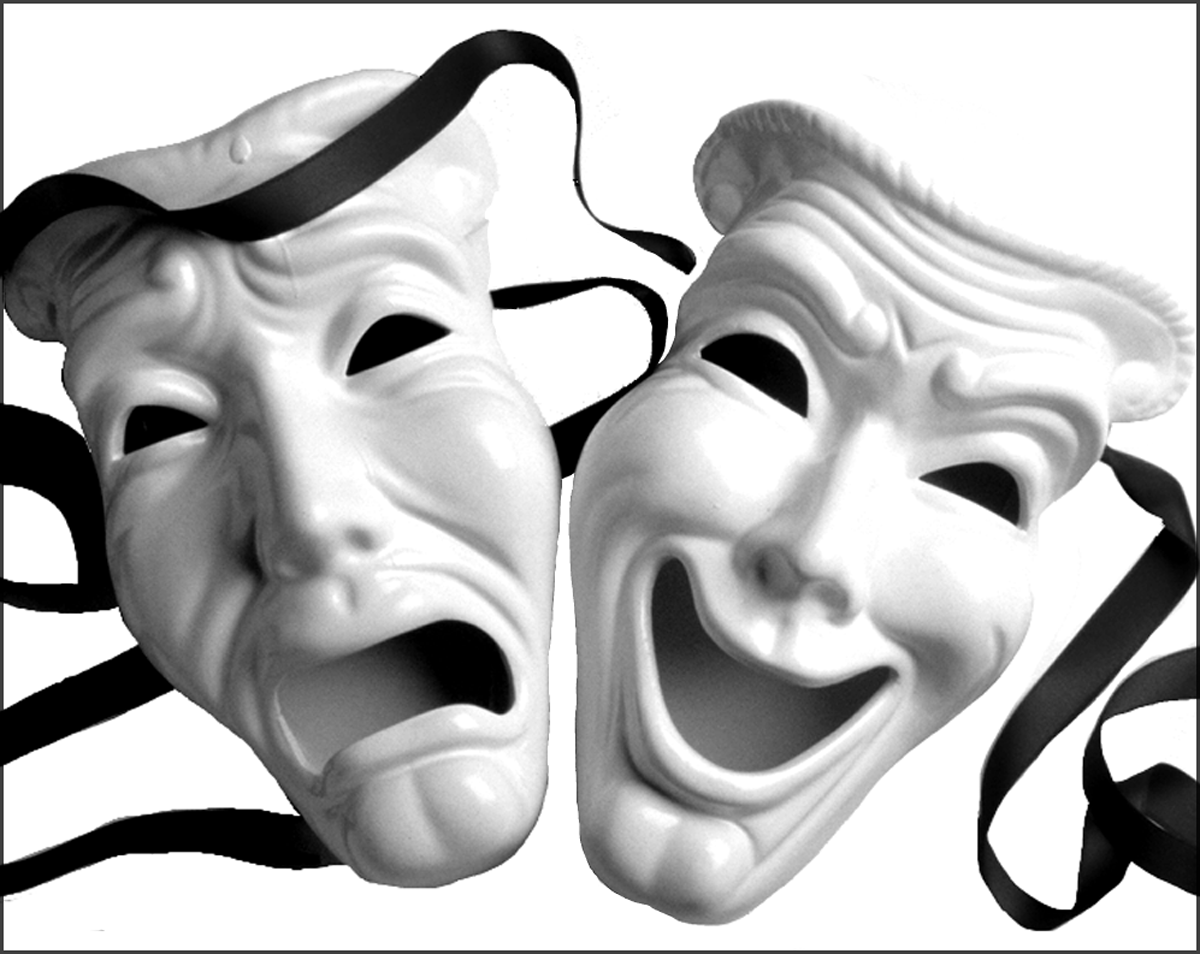
We have looked at two possible logos for our company. With our name "M.A.S.C Productions" we found that it looks like an ironic word of "Mask" so we have decided to have masks has out logo. Here are the two we looked at and what we decided.

We took this image from Google Images (See Source 1) and we thought the black ribbons where cut out of the frame didn't go well, so I uploaded the image into Photoshop, which I don't know how to use either, I have only used but I was just experimenting. So I found out how to get rid of the ribbons but we only kept the strip from the sad masks head which flows being the happy mask and we cut it off to make it look complete and not cut off from the frame. But has I was able to get rid of the un wanted ribbon I could see the outline of the ribbon that had been erased and I didn't know how to get rid of it. Only realising this when I had imported it into the timeline in Adobe Premier I decided to work with Shasta to find another picture. So the group decided that they didn't like the masks so I said I can find another picture from a site called Deviant Art (http://www.deviantart.com/) and found the picture below. 
 
I found this picture here -  http://browse.deviantart.com/?q=Masks&order=9&offset=24#/dxd4v3  and asked the owner of the picture -voorikvergeet if it was possible to use their work. On Deviant Art they are certain rules people need to follow by, as a member on the site for over 2 years I have learned to respect other artists work. One of the rules which is appreciated a lot is to ask the artist if it can be used for whatever reason, unless told by the artist in their artists comments that it can be used, it is free or it is free but you must give me link to the work you have used it for. Here I have done so:

My account is - Baby-x-Bat and has you can see I commented and asked if I can use it and explained what for. I found that the user hasn't been active for a while but with time not on our side I am going to use the masks anyway and then link her the video when I am able to upload it to YouTube (which I also have an account for)

Here is the chosen logo as a final in the Opening Film


Editing


I have started the opening sequence with the company's logo and name, as well has the credits for Producer and Director. I have placed the exterior shot of Burnley Mechanics in and from Tuesday 8th March 2011 filming session I have placed the clips we are going to use in the sequence.
Editing

1
In this panel you have your clips and titles for the movie. The colours represent what type of footage it is. Purples represent titles and blank footage so you can had titles and pictures and edit them easily. The Greens represent recorded footage or any type of footage that has been imported. With this you can edit them using the effects (See number 2) and which part of the footage you want (see numbers 4, 5, 6 and 8). The panel basically is the components that make up the film, the footage and the extra titles, these are the key points for the film and they are exactly what the film is made up of.

2
The effects panel is full of variety; these can be used on recorded/imported film footage as well has the titles and pictures. The effects are a lot different to those I have used in Windows Movie Maker, they are much more complex, they are worded differently to those in WMM which are worded simply and you can look at what action it does. I have used two types of effects which is “Cross Dissolve In” and “Cross Dissolve Out”. The text effects have their own effects too, as well as those in the Effects panel. The effects in the Text are better for the text has it actually uses the effect on the text and not the whole segment as a whole. In the upcoming weeks I am going to experiment and find out what each effect does and how it will be effective for the film. Using the “Cross Dissolve” is simple but effective and gives a really eerie sense to the film.

3
This is the screen where you will see the footage that you have in the left panel (See number 1) you can only see actual film footage not text or blank footage these have to be edited and placed in the time line separately to see them and work with them.
 
4, 5 and 6
These buttons are the point markers for the footage that you want to crop separately. Marker 4 is the starting point of the required footage you want and Marker 5 is the end point of the required footage this makes number 6. This is coloured a lighter gray to show you what you have highlighted. This makes it easier for the editor to cut footage they want out of the film and see what it looks like by playing the play, pause, Stop, Rewind and Fast Forward buttons on the left (See number 7) On the left hand screen (See number 14) you can see what the footage will look like when placed into the timeline below (See numbers 9, 10, 11, 12 and 13) by doing this you can click and hold the reel button (See number 8) and drag to the timeline for the required footage you have marked out.

7
This is an alternative way to Rewind or Fast Forward at your desired speed, so you have full control on how far you want to go back or forward or how slow you want to go to get to a certain point.

8
The button is pictures as a Film Reel, this will allow you to place the selected segment from that piece of footage on the timeline and from there you can edit further. Just click and hold and drag to the timeline.

9
This green bar represents the footage that you have edited/placed effects on or over etc; this allows you to see if you have “rendered” the footage together so that the effects work with the footage and runs smoothly when playing back. If there is the colour red in the green bar is means it hasn’t been rendered, so by using the keyboard shortcut “Enter” button it will render those pieces so that effects will work and the footage is able to work.

10
In this plane you placed your required text that you have made (will appear in your footage panel see number 1) you can decide where it goes within the time line and then in the separate panel, where the text is edited separately, you can decide where it goes on the screen, what it looks like and what effects you will use if any.

11
In this plane you place your required footage that you have in the footage panel (See number 1) and add any effects you want from the effects panel by click and hold and drag and drop onto the footage within the time line.

12 and 13
This panel is for your Audio. This is where you can add music or adjust the volume on the footage above, 13 is the audio of the footage above. You can use audio from any other footage you may have earlier or later in the time line and place it under another piece of footage. For example, you can use the Audio clip, 13, and place it under another piece of footage; you can place it in under two pieces of footage and have the audio overlapping from one to the over.

14
This is the screen where you can view your film from the timeline, and just like those in numbers 4, 5 and 7 you can use the same technique to see the footage at a certain point or to get back to the beginning or the end. As well has this you can edit where pictures and texts are placed as well has their size.


Here is the Keyboard that is used for Adobe Premier, this makes it easier for the editing with these shortcuts.


I haven't worked with a keyboard like this and it felt different to use a keyboard that was not only to be used for writing text but also to be used as shortcuts for the Adobe Premier Suite.


This is the Screen that allows you to add your text to your left hand panel with the other footages/Music etc. You are able to change the text with the variety of fonts below the display screen and change its size and colour.

Saturday, 5 March 2011

Editing - Opening Sequence and Exterior Shot


Thursday 3rd March 2011

Today I have started with the editing process and discussed with Michaela and Shasta which shot to use. We decided to go with the Pan left to right. In the editing suite I am using Adobe Premier. I have used Windows Movie Maker in the past for my own entertainment when I am have been making fan films for YouTube. So using Adobe Premier is much more advanced and complex than WMM. I will find this hard at first to get used to but I will find that I will enjoy using it with the more possibilities I have with it than those on WMM.


Here I have started to add the opening to the film with our production logo which is still in making and the exterior shot of Burnley Mechanics.
Through this session I have learned a few new skills using Adobe Premier and will make the editing process a lot easier.

Group Discussion - Backups, Descions Made, Film and Editing Proccess

Wednesday 2nd March 2011
Today I went to film the exterior shot of the theatre Burnley Mechanics (See screenshots below) BM is situated in Burnley and I had a general idea where it was. Yesterday Tuesday 1st March only me and Shasta where present and our teacher discussed what we could to get the filming process going. Shasta doesn't live in Burnley and doesn't know the area well so I took up the responsibility to go and shoot the exterior shot of BM. I looked at 3 possible types of shots I could use 1.) Mid shot 2.) Pan left to right 3.) Pan down
I looked on Google Maps and searched for Burnley Mechanics and used the Street View to have a look at the location.

Mid Shot
Hold for 4 Seconds Max


Pan Left to Right
Length: 4-6 Seconds


Pan Down
Length: 4 Seconds


Possible Shot
I decided not to go with this one seen has the audience wouldn't be able to see the theatre clearly and see exactly where they are suppose to look or know where the characters are placed.


This is the Street across from Burnley Mechanics. I will be on this side so I can get a good shot of the building and be able to use the 3 shots I have chosen.


I planned that I would be there at 9:00 am and be no longer than 15 minutes has I wouldn't need too long filming and would give me enough time to get good shots, as it is suited on a busy road which means cars and buses go past. As well has this it gives me a good enough time not to get anyone from the public in the shot.

Monday, 28 February 2011

Group Discussion - Storyboard and filming idea's - UPDATE

Just discussed some ideas for the filming process and were we are up to with the Storyboard. We have discussed filming ideas. The girls, before I rejoined, had a few friends who would be representing the characters for our film. After discussion about the possibilities of what might go wrong, we decided that as a backup Me and Michaela will be backup actors for the girls. Seen has the other people are from a different college, there is the possibility that they might not turn up for the filming days and that we would have to schedule our filming times around our college timetable as well has theirs. After more discussion me and Michaela will be the girls instead making it easier for us to film and that we are filming at our college and that we will be scheduled at the right time to film, we will be filming in our time for media.

I found this gave me peace of mind, knowing that we won’t be waiting around and wasting time, that the filming process can flow easier, as the location is on the site, we attend the college, we are filming at the same time we are scheduled to as well has in our own time and it is easier for us to communicate to keep in contact just in case one of us can’t make it for the filming days.


Group Production Roles


Opening Sequence Planning Sheet


Narrative Planning Sheet


Here are the Storyboards:


Storyboard 1

Storyboard 2

Storyboard 3

Storyboard 4